
When it comes to making top-quality hay, the most important tools for the job include:
- Your hay baler.
- Your tractor.
- Your moisture meter.
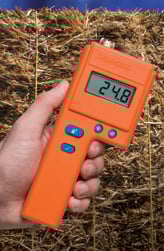
The first two items in the above list are what allow modern-day farmers to harvest and bale their hay quickly. The last item, however, is what tells farmers that their hay is ready to be harvested. With a high-quality moisture meter, you can take a reading of the moisture content of hay with ease.
But, how does one get the most out of their moisture meter for hay production? To help answer this pressing question, we’ve assembled a short list of the best practices for using moisture meters for hay:
Best Practice #1: Take Multiple Readings!
As we recently discussed in another blog post, one of the best ways to make sure that your moisture readings are accurate is to take several readings each time you test. This way, your plans for managing your hay production won’t be thrown off by a single abnormal result. Plus, you’ll be much more likely to find a moisture pocket that may have been missed with a less thorough check.
Best Practice #2: Take Care of Your Meter’s Probes/Electrodes in between Uses
When using extended-length probes that are 10” to 18” long, be aware that these probes need to be taken care of. Not even the best-made probes will last for very long if they are not properly stored and maintained in between uses.
If there is excessive debris or moisture collected on the probes, detach them from the meter and gently wipe them clean with a cloth before storing them.
Best Practice #3: Handle Probes with Care when Taking Measurements
In fact, the longer the probe, the more gently it needs to be handled. Extended-length probes are more susceptible to breaking when force is applied to them. If you experience heavy resistance to pushing the probes into a hay bale or a haystack, do not try to force them. Simply remove the probes, and try inserting them again from a different angle. Alternatively, you could drill or core the bale to get the probe in to a point where you’ll only have to push at the very end.
Best Practice #4: Use the Right Meter for the Job
 When it comes to measuring moisture in hay, not just any moisture meter will do. Using a probe-type meter with a multi pin probe such as our #831 probe is a must for getting the most accurate readings of the moisture conditions within the windrow.
For stacked or baled hay, using probes that are long enough to achieve penetration of the bale is important. Ideally, the probes on your meter should be somewhere between 10”-18” long, depending on the size and density of your hay bales.
Best Practice #5: Don’t Forget the Temperature
On extremely hot or cold days, the ambient temperature can influence moisture readings. While most farmers prefer to not bale their hay on days with temperatures in either extreme, once the hay is cut, there’s only so much time that it can sit before needing to be baled, so you may not always have a choice. Part of getting the most nutritive value out of hay is in cutting the plants being used for hay just before their seeds ripen, and Mother Nature may not always be kind to your schedule.
So, if you are forced to harvest hay on a day that is either very cold or very hot, be sure to take how the temperature affects your moisture readings into account.
Best Practice #6: Keep Taking Readings throughout the Harvesting Process
Speaking of the temperature on any given day, it is important to keep checking the moisture content of hay throughout the entire harvesting cycle instead of relying on readings that were taken at the start of the morning.
As the day goes on, the heat from the sun will continue to evaporate the moisture in the hay being harvested. Over time, the hay may become too dry to continue baling, and you will have to stop harvesting.
By frequently checking the moisture content of your hay as you bale it, you can know when to stop and avoid creating a bale of substandard hay. Moisture meters that can be mounted on a baler are particularly useful for this, as they can give you a real-time measurement of the moisture content of the hay you’re baling.
Best Practice #7: Check Your Meter’s Calibration Regularly
 No matter how well-made a meter is, it can eventually become less accurate over time. Whether it is because of damage to the probes or even contamination of the PC board, every meter is bound to lose accuracy over time. This is why it is important to check your meter’s calibration before any hay harvest.
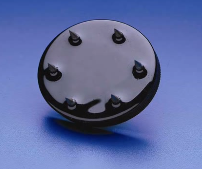
The specific method for verifying your meter’s calibration can change depending on the model of the moisture meter you’re using. Some meters use a specialized testing device, while others have a built-in calibration check. Meters with built-in calibration checks are highly convenient because they allow you to test them anytime, anywhere.
By verifying your meter’s calibration, you can be confident that your meter is giving you the most accurate readings possible.
Best Practice #8: Read the Owner’s Manual
For many moisture meters, the owner’s manual that comes with the device is a handy resource that can answer a lot of commonly asked questions. From proper care and maintenance to how to get a reading with the meter, the manual can be of great help.
If you’ve lost your copy of the manual to your Delmhorst moisture meter, you can find a pdf of it on our website.
To learn more about moisture meters, be sure to contact our moisture meter specialists today at the link below.

Comments